How to Seamlessly Connect Metal and Plastic Pipes Using PPR Fittings

Connecting metal and plastic pipes presents unique challenges. Dissimilar materials often lead to galvanic corrosion, causing metal deterioration over time. Different pipe materials also have unique properties. They can react negatively when connected improperly. This results in future leaks and failures. Specialized PPR fittings provide a solution. These fittings, like a Ppr Male Adaptor and female unions, achieve robust, leak-proof transitions. They ensure a durable plumbing system.
Key Takeaways
- PPR fittings help connect metal and plastic pipes. They stop leaks and corrosion.
- Always prepare pipes well. Clean them and cut them straight for a good connection.
- Use the right heat and time for PPR fusion. This makes a strong bond.
- Apply thread sealant correctly. Do not overtighten connections to prevent damage.
- Always test your pipes with pressure. This finds leaks before they cause problems.
Understanding PPR Fittings for Metal-to-Plastic Connections

What are PPR Male Adaptors and Female Unions
PPR male adaptors and female unions are specialized fittings. They create a secure bridge between PPR pipes and traditional metal piping systems. Manufacturers primarily make these fittings from PP-R (Polypropylene Random Copolymer). This material offers durability and resistance. Many designs, like other PPR Brass Insert Pipe Fittings, also incorporate brass inserts. These brass components provide additional strength and toughness. They make the fittings resistant to high-pressure levels. These fittings adhere to various international standards, including DIN, GB, ASTM, BS, JIS, and ISO, ensuring quality and compatibility. Specific standards like DIN8077/8088, DVGW, and DIN 8077&DIN 8078 further certify their performance.
Why PPR is Ideal for Dissimilar Pipe Transitions
PPR stands out as an ideal material for pipe transitions. It offers high thermal resistance, making it suitable for hot water supply systems. PPR also demonstrates excellent resistance to a wide range of chemicals. This includes acids, bases, and salts. This chemical resilience surpasses many other plastics. For example, PVC pipes have lower thermal resistance and are generally for cold water applications. PPR’s long lifespan and smooth inner surface further contribute to its effectiveness. This minimizes friction loss and ensures efficient flow. Its environmental friendliness also makes it a preferred choice.
Essential Components for Connection
Connecting metal and plastic pipes requires specific components. You need the appropriate PPR male adaptor or female union. These fittings match the sizes of both the PPR and metal pipes. You also need a heat fusion machine for the PPR side of the connection. Thread sealant is crucial for the metal threaded connections. Additionally, basic plumbing tools like pipe cutters, wrenches, and cleaning supplies are necessary.
Step-by-Step: Connecting with a Ppr Male Adaptor
Connecting a PPR pipe to a metal pipe using a Ppr Male Adaptor requires careful execution. Following these steps ensures a strong, leak-free connection.
Gather Tools and Materials
Successful pipe connection begins with the right equipment. Gather all necessary tools and materials before starting. For the PPR pipe preparation, a fusion welding machine is essential. This machine uses interchangeable heater heads matching the pipe size. It also has digital temperature controls for consistent heating. A pipe cutter ensures a clean, square cut for PPR pipes. This avoids rough edges that saws might create. A pipe chamfering or deburring tool removes burrs and sharp edges after cutting. A measuring tape helps with accurate pipe length measurements. For the metal pipe, you will need a wrench, a wire brush, and a thread sealant. Ensure you have the correct size Ppr Male Adaptor for both pipe diameters.
Prepare PPR Pipe
Proper preparation of the PPR pipe is crucial for a successful heat fusion. First, measure the required length of the PPR pipe. Mark the cutting line clearly. Use a specialized PPR pipe cutter to make a clean, square cut. This type of cutter is designed for PPR pipes. It makes precise cuts essential for tight, leak-proof connections. Avoid using standard wood saws, as they create excessive burrs. After cutting, use a deburring tool to remove any sharp edges or burrs from the pipe’s end. This step is critical for proper fitting and fusion. A chamfering tool can also create a slight bevel on the outer edge. This helps guide the pipe into the fitting. It also prevents scraping of melted material during fusion. Finally, clean the pipe end thoroughly. Use 99% purity isopropyl alcohol and lint-free cloths. This removes any dirt, grease, or moisture. A clean surface ensures optimal adhesion during the heat fusion process.
Prepare Metal Pipe
The metal pipe also requires careful preparation, especially its threaded end. First, inspect the threads for any imperfections or damage. Look for nicks, burrs, or signs of cross-threading. Repair or replace any damaged threads to ensure a proper seal. Next, clean the threads thoroughly. Use a wire brush to remove any old sealant, dirt, metal shavings, or residual cutting oil. If oil or lubricants are present, use a solvent-based degreaser. This ensures the threads are completely clean and dry. Clean threads are vital for the thread sealant to work effectively. A clean surface helps the sealant bond properly.
Apply Thread Sealant
Applying thread sealant correctly ensures a watertight connection. First, select the right type of sealant. For plastic threads, Teflon-based pipe thread sealants are recommended. This includes Teflon tape, which you wrap 2 to 3 turns around the male thread. Liquid Teflon-based sealants also work well. Avoid anaerobic thread sealants. They may contain chemicals that can damage plastics. Apply the sealant evenly to the male threads of the metal pipe. Ensure complete coverage of the threads. This creates a barrier against leaks.
Heat Fuse PPR Male Adaptor to PPR Pipe
Heat fusion creates a strong, permanent bond between the PPR pipe and the Ppr Male Adaptor. First, turn on the heat fusion machine. Allow it to reach the correct temperature. The machine has two heating dies. One die fits inside the PPR pipe. The other die fits around the outside of the Ppr Male Adaptor. Insert the prepared PPR pipe end into its heating die. Simultaneously, place the Ppr Male Adaptor onto its heating die. Hold both components firmly in place for the recommended heating time. This time depends on the pipe diameter and the machine’s specifications. The plastic will soften. Quickly remove both components from the heating dies. Immediately push the PPR pipe into the Ppr Male Adaptor. Apply steady pressure. Hold the connection still for the specified cooling time. This allows the plastic to fuse and solidify.
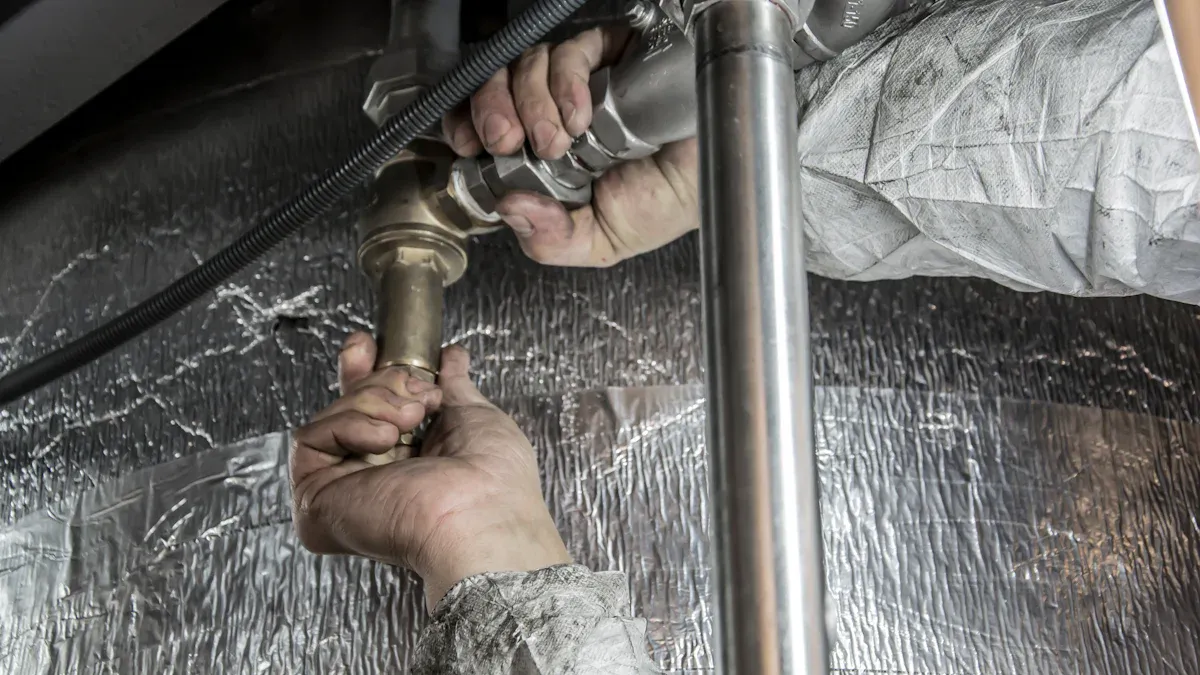
Threaded Connection to Metal Pipe
Now, connect the fused PPR pipe and Ppr Male Adaptor to the metal pipe. Carefully align the threaded end of the Ppr Male Adaptor with the prepared threads of the metal pipe. Begin to thread the connection by hand. Turn it until it feels finger-tight. For tapered pipe threads, whether metal or plastic, a simple rule applies. Tighten them finger-tight, then add one to two turns with a wrench. Do not use torque as a reference for installing NPT and NPTF threaded components. Many factors affect torque, such as mixed materials, sealant slipperiness, and thread variations. Over-tightening can damage threads or crack the fitting. This leads to leaks. Ensure the connection is snug but not strained.
Step-by-Step: Connecting with a PPR Female Union
When to Use a Female Union
A PPR female union offers a versatile solution for connecting PPR pipes to metal systems. People often choose it when they need a connection that allows for future disassembly. For example, if a component in the metal pipe system might require maintenance or replacement, a union provides a convenient break point. It also works well when connecting to existing threaded metal components, such as valves, pumps, or water heaters. The union’s design allows for a secure, threaded connection to the metal side while maintaining the robust heat-fused bond on the PPR side. This flexibility makes it a valuable fitting in many plumbing scenarios.
Prepare PPR Pipe for Union
Proper preparation of the PPR pipe ensures a strong, leak-free heat fusion with the female union. First, measure the required pipe length. Use a specialized PPR pipe cutter to make a clean, straight cut. This prevents rough edges. After cutting the pipe, inspect its edges for burrs or rough spots. Use a deburring tool or sandpaper to smooth them. This ensures a secure connection. Next, clean the PPR pipe end with a cloth and the recommended cleaner from the fusion tool kit. Allow the pieces to dry briefly. This removes any dirt, grease, or moisture. Then, mark the welding depth on the joining end of the pipe. Use a template from the fusion tool set. Alternatively, measure the fitting depth and subtract one millimeter (0.039 inches). This mark guides the fusion process. Finally, inspect the inside of the female union (fitting socket) for debris or dirt. Clean it if necessary. Ensure the fitting size matches the pipe diameter. This prevents leaks or improper connections.
Prepare Metal Pipe for Union
The metal pipe also needs careful preparation for a secure, threaded connection with the female union. First, inspect the metal pipe’s threads for any damage or imperfections. Repair or replace any damaged threads. Clean the threads thoroughly with a wire brush. This removes old sealant, dirt, or metal shavings. A clean surface helps the thread sealant work effectively. Next, apply thread sealant to the male threads only. This prevents excess sealant from entering the pipe and contaminating the system. For PTFE tape application, wrap it clockwise as one looks at the end of the nipple. This ensures the act of tightening smooths the tape. Start at the second thread from the end. Apply two to three wraps, stretching the tape slightly. If using pipe dope, apply a moderate, even coat to the male threads only. Start from the second thread. Ensure full coverage around the circumference. Always start the connection by hand. Threads should screw together smoothly for several turns. If resistance or binding is felt, stop. Unscrew, re-inspect, and try again. Never use a wrench to start a fitting. This can lead to cross-threading and permanent damage to both components.
Apply Thread Sealant to Metal Threads
Applying thread sealant correctly ensures a leak-proof connection between the metal pipe and the PPR female union. Plumbers typically use specific types of sealants for metal threads. These include PTFE tape or a compatible thread sealant compound. They apply the sealant to the male threads of the metal pipe.
When using PTFE tape, plumbers wrap it clockwise around the male threads. They usually apply three to four wraps. This direction ensures the tape tightens as they screw the fitting on. They start wrapping at the second thread from the end. This prevents the tape from unraveling during assembly. After wrapping, they hand-tighten the female end of the union onto the pipe. This initial step ensures proper alignment. Then, they use a wrench to tighten the central nut by one to two turns. This secures the connection. It is crucial to avoid overtightening. Excessive force can damage the threads or crack the fitting. If a connection needs re-tightening or disassembly, plumbers reapply PTFE tape. They can also use a thread sealant compound for a robust seal.
Heat Fuse PPR Female Union to PPR Pipe
Heat fusion creates a strong, permanent bond between the PPR pipe and the PPR female union. First, the heat fusion machine reaches its correct operating temperature. The machine has two heating dies. One die fits inside the PPR pipe. The other die fits around the outside of the PPR female union. A plumber inserts the prepared PPR pipe end into its heating die. Simultaneously, they place the PPR female union onto its heating die. They hold both components firmly in place for the recommended heating time. This time depends on the pipe diameter and the machine’s specifications. The plastic softens during this process.
After heating, the plumber quickly removes both components from the heating dies. They immediately push the PPR pipe into the PPR female union. They apply steady pressure. They hold the connection still for the specified cooling time. This allows the melted plastic to fuse and solidify. This process creates a homogeneous, leak-free joint. It forms a bond as strong as the pipe itself.
Threaded Connection to Female Union
Connecting the metal pipe to the PPR female union’s threaded side requires careful attention. First, the plumber aligns the threaded end of the metal pipe with the prepared threads of the female union. They begin to thread the connection by hand. They turn it until it feels finger-tight. This initial hand-tightening prevents cross-threading. Cross-threading can permanently damage both the metal pipe threads and the union’s threads.
Once hand-tight, the plumber uses a wrench to complete the connection. They tighten the union nut firmly but avoid overtightening. Overtightening can stress the plastic components or damage the metal threads. It can also lead to future leaks. The goal is a snug, secure connection without excessive force. They ensure the connection is properly aligned and stable. This completes the seamless transition from the metal pipe to the PPR pipe system.
Secure the Union Nut
Securing the union nut represents the final crucial step in establishing a robust connection between the PPR female union and the metal pipe. This action ensures a leak-proof seal and maintains the integrity of the entire plumbing system. After threading the metal pipe into the female union, plumbers must carefully align the union nut. This nut typically has internal threads that engage with the external threads on the metal pipe’s adapter or fitting.
First, plumbers hand-tighten the union nut. They turn it clockwise until it feels snug. This initial hand-tightening helps prevent cross-threading. Cross-threading can damage both the nut and the union body. It also ensures proper alignment of the components. A smooth, easy turn indicates correct engagement of the threads. If resistance occurs, plumbers should stop. They then unscrew the nut, re-inspect the threads, and try again.
Once hand-tight, plumbers use a wrench to complete the tightening process. They apply steady, firm pressure. The goal is to achieve a secure connection without excessive force. Over-tightening can cause significant problems. It can strip the threads on either the metal pipe or the union nut. It can also crack the plastic body of the PPR union. This compromises the seal and leads to leaks. A good practice involves tightening the nut about one to two full turns past hand-tight. This provides sufficient compression for the internal sealing mechanism.
During tightening, plumbers observe the connection for any signs of strain or misalignment. The union should sit squarely on the metal pipe. No gaps should appear between the mating surfaces. A properly secured union nut creates a strong mechanical bond. This bond withstands system pressure and prevents movement. It also allows for future disassembly if maintenance becomes necessary. This feature highlights the versatility of a female union. It offers both a permanent heat-fused connection on one side and a serviceable threaded connection on the other.
Properly securing the union nut ensures the long-term reliability of the metal-to-PPR transition. It prevents costly leaks and maintains efficient water flow. This final step completes the seamless integration of two different piping materials.
Tip: Always use the correct size wrench for the union nut. An ill-fitting wrench can slip, damaging the nut or causing injury.
Critical Tips for Leak-Proof PPR Connections
Achieving leak-proof PPR connections requires precision and adherence to best practices. Plumbers must pay close attention to several critical factors during installation. These factors ensure the long-term reliability of the plumbing system.
Proper Heat Fusion Temperature and Time
Heat fusion forms the core of a strong PPR connection. The welding machine must operate within an optimal temperature range. This range is typically 260°C to 270°C (500°F to 518°F). Most professional machines perform best at 265°C. This temperature provides consistent results across various pipe diameters and wall thicknesses. Temperatures below 250°C lead to incomplete fusion. This results in a weak joint. Temperatures above 280°C cause material degradation. This compromises the joint’s integrity.
Heating time also plays a crucial role. Larger pipes and thicker walls require extended heating periods at the standard 265°C setting. Cold ambient temperatures also necessitate longer heating times. Conversely, hot conditions can lead to overshooting the temperature. A properly heat-fused joint appears smooth and seamless. It shows no gaps or bubbles. Under-heating results in poor adhesion. Over-heating causes excessive melting, deformation, or a reduction in the pipe’s internal diameter. Irregular melt lines or discoloration indicate welding defects.
Correct Thread Sealant Application
Thread sealants are essential for tapered pipe threads. They fill voids and ensure a leak-free seal. Plumbers apply appropriate thread sealant, either tape or liquid, to the male threads. They apply sealant sparingly to prevent obstruction in the piping system. It is crucial to avoid covering the end of the threads. This prevents sealant from entering the flow path. Plumbers leave the first thread uncovered. This also stops sealant from falling into the flow path. After hand-tightening, plumbers use a wrench to tighten further. They typically turn one to two times past hand-tight. They always check manufacturer specifications for precise guidance.
Avoid Over-tightening
Over-tightening threaded connections, especially those involving PPR fittings, causes significant problems. It can strip threads or damage the fitting itself. This leads to air leaks and increased operational costs. System failures and costly downtime can also occur. Over-tightening can also damage the pipe. It compresses the pipe, leading to distortion. This results in leaks or even cracks. For plastic fittings, plumbers hand-tighten first. They then use a wrench for an additional quarter or half turn. This depends on the fitting type. Always refer to the manufacturer’s specifications for torque and installation. This prevents costly damage and ensures a secure, lasting connection.
Ensure Cleanliness
Cleanliness is paramount for successful PPR connections. Any dirt, grease, or moisture on the pipe or fitting surfaces can severely compromise the heat fusion process. Contaminants prevent the plastic from bonding properly. This creates weak points in the joint. These weak points can lead to leaks over time. Before any fusion, plumbers thoroughly clean both the PPR pipe end and the inside of the fitting. They use a clean, lint-free cloth and a suitable cleaning agent, such as 99% purity isopropyl alcohol. This step removes all foreign substances. A clean surface ensures optimal adhesion. It allows the plastic materials to melt and fuse completely. This creates a strong, homogeneous, and leak-proof connection.
Perform a Pressure Test
After completing all connections, plumbers must perform a pressure test. This critical step verifies the integrity of the entire plumbing system. It ensures all joints are leak-free before final operation. Different PPR pipes have various pressure ratings. For example, PN10 pipes handle cold water up to 20°C. PN16 pipes are suitable for hot water up to 60°C. PN20 pipes manage high-pressure industrial hot water. PN25 pipes serve heavy-duty industrial applications.
Installers test newly installed systems at 1.5 times the working pressure. They hold this test pressure for a minimum of 30 minutes. This confirms the connections can withstand operational demands.
Here is a standard hydrostatic pressure testing procedure:
- Fill the pipeline slowly with clean water. Vent all air from the system.
- Gradually increase pressure to 1.5 times the design working pressure. Local codes may specify different pressures.
- Allow the pressure to stabilize for 10–15 minutes.
- Maintain the test pressure for 30 minutes to 2 hours.
- Monitor pressure drop. Check for any visible leaks at all joints and fittings.
Pneumatic pressure testing uses dry, clean air or inert gas. Installers increase pressure in small increments. The test pressure is typically 1.1 to 1.3 times the working pressure. They maintain this pressure for 30–60 minutes. They check joints with soapy water for leaks if codes allow. Common standards for pressure testing include ASTM F2164 and ISO 4427.
| Pipe Type | Typical Test Pressure |
|---|---|
| HDPE Pipe | 1.5 × Working Pressure |
| PVC Pipe | 1.25 × Working Pressure |
| Steel Pipe | ≥ 1.5 × Working Pressure |
| PPR Pipe | As per DIN 8077/8078 |
This final check guarantees a reliable and durable plumbing system.
Common Mistakes to Avoid in PPR Connections
Inadequate Pipe Preparation
Proper pipe preparation is crucial for strong PPR connections. Many installers make mistakes during cutting and deburring. For example, using saws instead of dedicated PPR cutters can leave rough edges or plastic debris inside the pipe. These inaccurate cuts compromise fusion quality. They lead to weak or leaky joints. Ragged or concave cuts can trap air bubbles during welding. This creates voids that reduce pressure-bearing strength. If the pipe end is not flat, it will not make full contact with the heating plate. This leads to partial bonding and potential failure. Plastic dust and shavings from sawing can also get trapped in the joint wall during fusion. This creates potential failure points. Uneven or angled cuts prevent proper insertion into fittings. They also create stress points that can lead to failure under pressure. Failing to deburr means not removing rough edges or plastic shavings after cutting. This results in improper fusion and turbulence in water flow. It also reduces system efficiency.
Incorrect Heat Fusion Technique
The heat fusion process requires precision. Mistakes here compromise the integrity of PPR pipe joints. Incorrect heating temperature is a frequent error. Both overheating causes over-melting, deformation, or burning. Underheating leads to insufficient melting and insecure bonds. Both compromise joint integrity. Inaccurate heating time also causes problems. Excessive heating time can cause over-melting. This leads to instability, cracks, or leaks. Insufficient time results in inadequate melting and loose joints. Misalignment of the pipe and fitting during fusion creates uneven melted areas. This compromises the seal and leads to loosening or leakage. Contaminated pipe or fitting surfaces also cause issues. Dirt, oil, or moisture prevent proper melting and even fusion. This results in weak connections. Moisture specifically hinders melting. Contaminants impede the heating process. Insufficient cooling time prevents the connection from setting properly. This leads to leakage or instability. Rapid cooling can cause cracks or deformation. Finally, mismatched pipe and fitting sizes lead to ineffective fusion. This results in weak connections or installation difficulties.
Improper Thread Sealant Use
Applying thread sealant correctly is vital for leak-proof threaded connections. Installers sometimes use the wrong type of sealant. Some sealants are not compatible with plastic threads. They can damage the fitting over time. Applying too much sealant can block the flow path. Applying too little sealant will not create a proper seal. Installers should apply sealant only to the male threads. Applying it to female threads can push excess sealant into the pipe. This can contaminate the system. Not cleaning the threads before application also causes problems. Dirt or old sealant prevents the new sealant from bonding properly. Over-tightening after sealant application can squeeze out the sealant. It can also damage the threads or crack the fitting.
Mixing Incompatible Threads
Mixing incompatible threads creates significant problems in plumbing connections. Different thread standards exist globally. They are not interchangeable. For example, plumbers often encounter two main types:
- NPT (National Pipe Thread): This standard is common in the USA. It uses a tapered thread design.
- BSP (British Standard Pipe): This standard is prevalent in Europe and many international markets. It can be tapered (BSPT) or parallel (BSPP).
These standards have different thread angles, pitches, and shapes. They do not fit together properly. Trying to force them can damage both the PPR fitting and the metal pipe. This leads to leaks and system failure. PPR unions are designed to be compatible with metal pipes through internationally recognized thread standards. These include BSP, NPT, and sometimes ISO threads (ISO 7-1 or ISO 228-1). Always ensure the correct thread type and size when connecting PPR fittings to metal pipes. A mismatch guarantees a faulty connection.
Skipping Pressure Testing
Skipping pressure testing is a critical mistake. Installers must always test a newly installed plumbing system. This step confirms the integrity of all connections. It ensures the system can handle operational demands. Without a pressure test, hidden leaks can go undetected. These leaks cause water damage, mold growth, and costly repairs later. A small leak can waste significant amounts of water over time. It also reduces system efficiency.
Pressure testing identifies weak points before the system goes into full service. It helps installers find and fix problems early. This prevents major failures. A proper test involves filling the system with water or air. Then, installers pressurize it to a level higher than normal operating pressure. They monitor the pressure for a set period. A stable pressure reading indicates a leak-free system. A drop in pressure signals a problem. Installers then locate and repair any leaks. This final check guarantees a reliable and durable plumbing system.
You can now confidently connect metal and plastic pipes. Use specialized PPR fittings like the Ppr Male Adaptor and female unions. Following best practices ensures a durable and leak-free plumbing system. These methods create robust transitions. They prevent future leaks and maintain system integrity. Donsen provides high-quality PPR products for these essential connections. They help you achieve reliable and lasting results in your plumbing projects.
FAQ
Can installers use PPR fittings for all types of metal pipes?
PPR fittings are compatible with common metal pipes. These include copper, galvanized steel, and PEX-AL-PEX. Installers must ensure thread compatibility, such as NPT or BSP, for a secure connection.
What is the lifespan of a PPR connection?
A properly installed PPR connection can last over 50 years. This durability comes from PPR’s resistance to corrosion, scaling, and chemical degradation. It ensures a long-lasting plumbing system.
Does installation of PPR fittings require special training?
Yes, installers should receive training for heat fusion techniques. This training covers proper temperature control, heating times, and fusion procedures. Correct installation guarantees a leak-free system.
Can installers reuse PPR fittings?
No, installers should not reuse PPR fittings after heat fusion. The fusion process permanently alters the plastic. Reusing fittings compromises the joint’s integrity. This can lead to leaks.
What happens if installers overtighten a threaded PPR connection?
Overtightening a threaded PPR connection can damage the threads. It can also crack the fitting. This compromises the seal. It leads to potential leaks and system failure. Installers should tighten connections carefully.
See Also
Essential Air Fryer Pan Upgrades: Must-Have Accessories for Better Cooking
Simple Steps to Replace Your PowerXL Air Fryer Basket
Air Fryer Frozen Ravioli: A Quick and Delicious Meal Solution
Beginner’s Guide: Perfecting Frozen Egg Rolls in Your Air Fryer